

Quick update on this problem:
As suggested, I turned on one-wall in the slicer. That eliminated the holes.
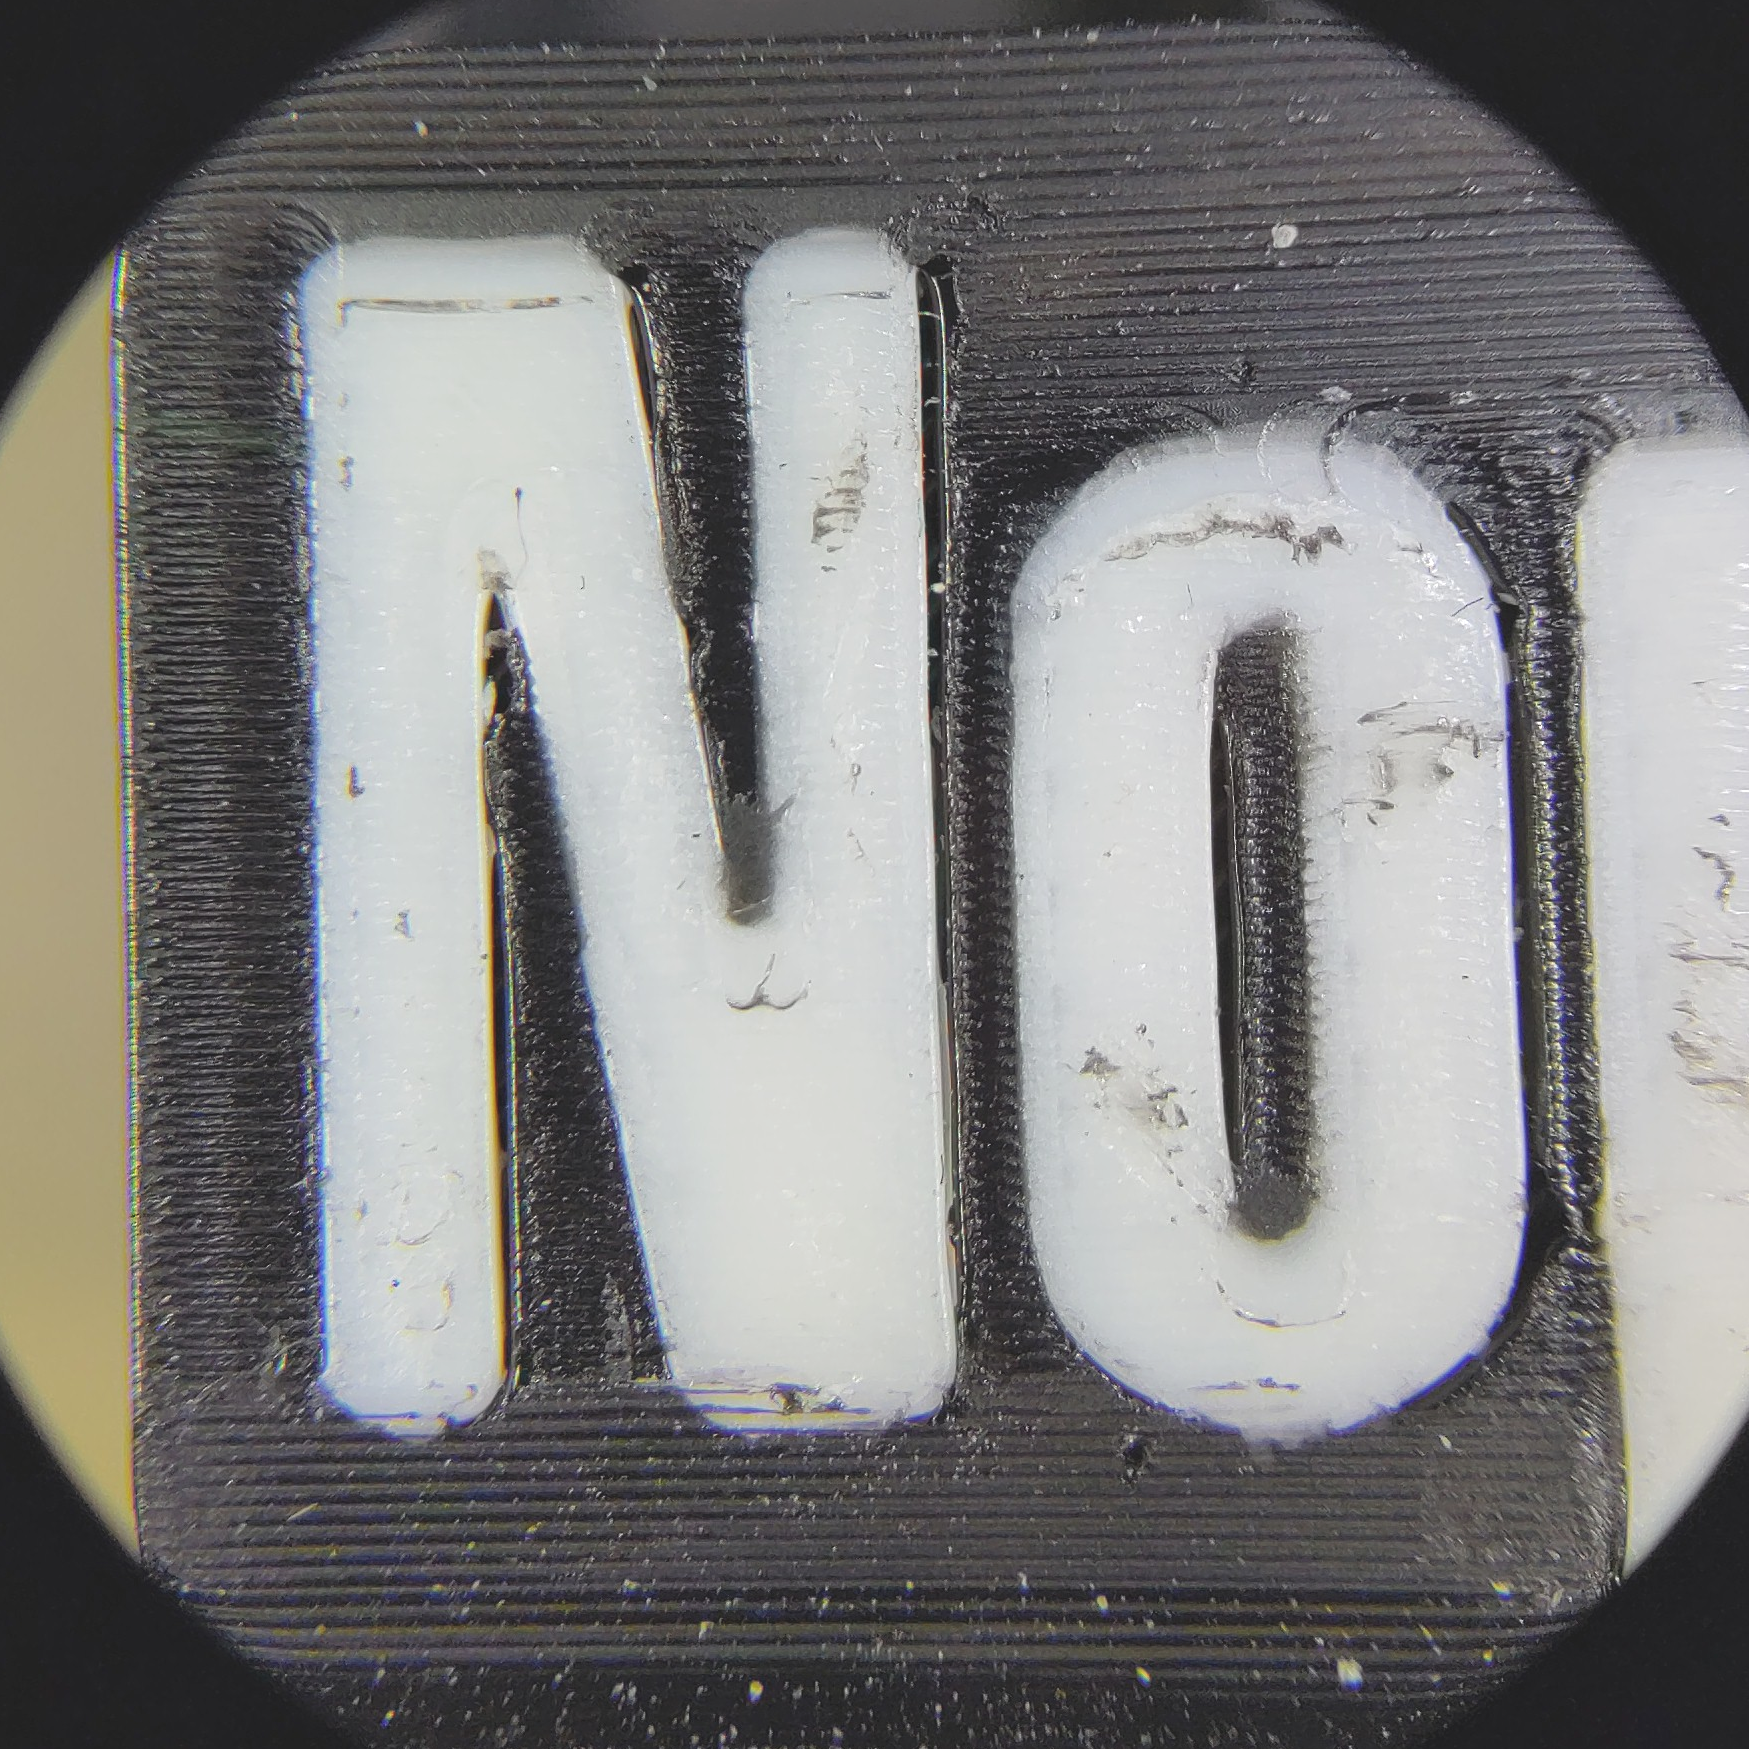
However, I also turned on ironing and that seems to have created black smears in the white letters: it looks like black material that got picked up by the white nozzle at the edge of the letters and got dragged across.
I know it’s ironing because it’s just at the surface and it scratches off easily with the tip of an x-acto knife.
So, I think ironing may not be such a great idea with such small bi-color features. Maybe the smearing is acceptable on the edge of a large features with another color, but those letters are 10mm so it kind of ruins them across the entire width.
Apart from that, there are gaps between the black and the white material on the right-hand edges of the letters. But it only shows under the microscope: they’re not really visible, and certainly don’t stand out like the black holes right in the middle of the letters like before.
So for the next print, I’ll turn off ironing and see how it goes. I think one-wall alone will do nicely.
Thanks for the tips everybody!
Depending on your slicer, you can enable arachne for variable perimeter widths, which helped me with the same problem
I know nothing about 3D printing, but I’m irrationally, deeply invested since I saw your first post with the holes. Progress!
Something tells me you’d have fun if you got yourself a printer and got into the hobby. Hint hint… 🙂
Damn, I might need to!
What size nozzle are you using? Also have you messed with extrusion settings at all, especially amount? I feel like the previous advice had you change an advanced setting when you’re dealing with a basic setup issue.
0.4 mm.
I mess around with one setting at a time, to find out what each of them does in isolation. At some point I will look into calibrating the rate of extrusion. But for now, I’m playing with simple options.
Also, it’s not art. This is a piece of equipment for the shop floor. It’s already plenty good enough. I’m just curious how to make it better 🙂
Just checking on things, no offense intended for anything I asked and I apologize if it came off that way.
The voids we’re seeing look like possible under extrusion and I didn’t see that mentioned before. If you haven’t changed any of those settings that is likely not the issue. All of the printers I’ve worked with do just fine with default settings.
Do you have infill set at 100%? I may have missed that detail. What pattern is selected for the infill? Some patterns work better than others.
How tight are the rollers for all three axes? They should be just tight enough to prevent any wobble in each direction. Too tight and the print head might be restricted.
Last thing for this round: Since you’re getting smudges of the other color, your temps may be set too high.
Just some late night thoughts for now. Hopefully something might ring a bell.
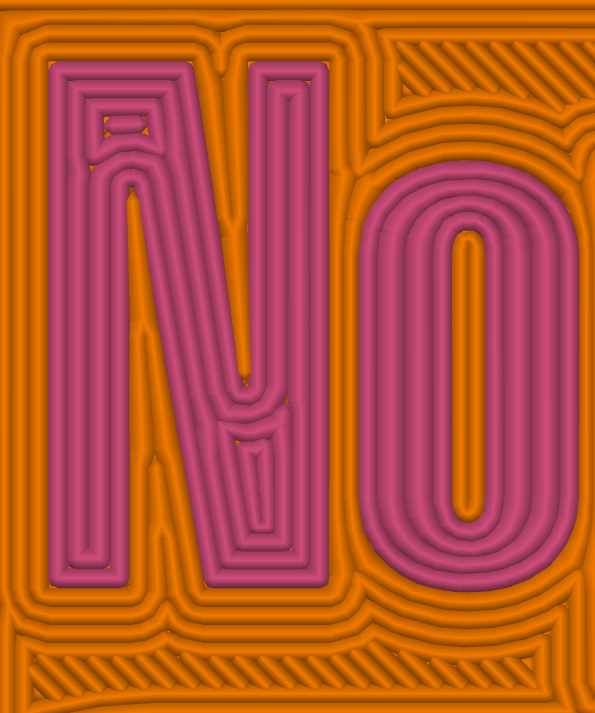
The voids comme from the arachne perimeter generator - since that’s what the slicer uses in the letters, because they’re too small to contain anything but perimeters. You can even see them in the slicer’s rendition:

There seems to be a way to eliminate then - in the slicer anyway - by increasing the perimeter transition threshold angle from 10° to 40°, but I haven’t tried it yet:
One-wall looks better anyway, so I’ll try it again, without ironing this time.