

Quick update on this problem:
As suggested, I turned on one-wall in the slicer. That eliminated the holes.
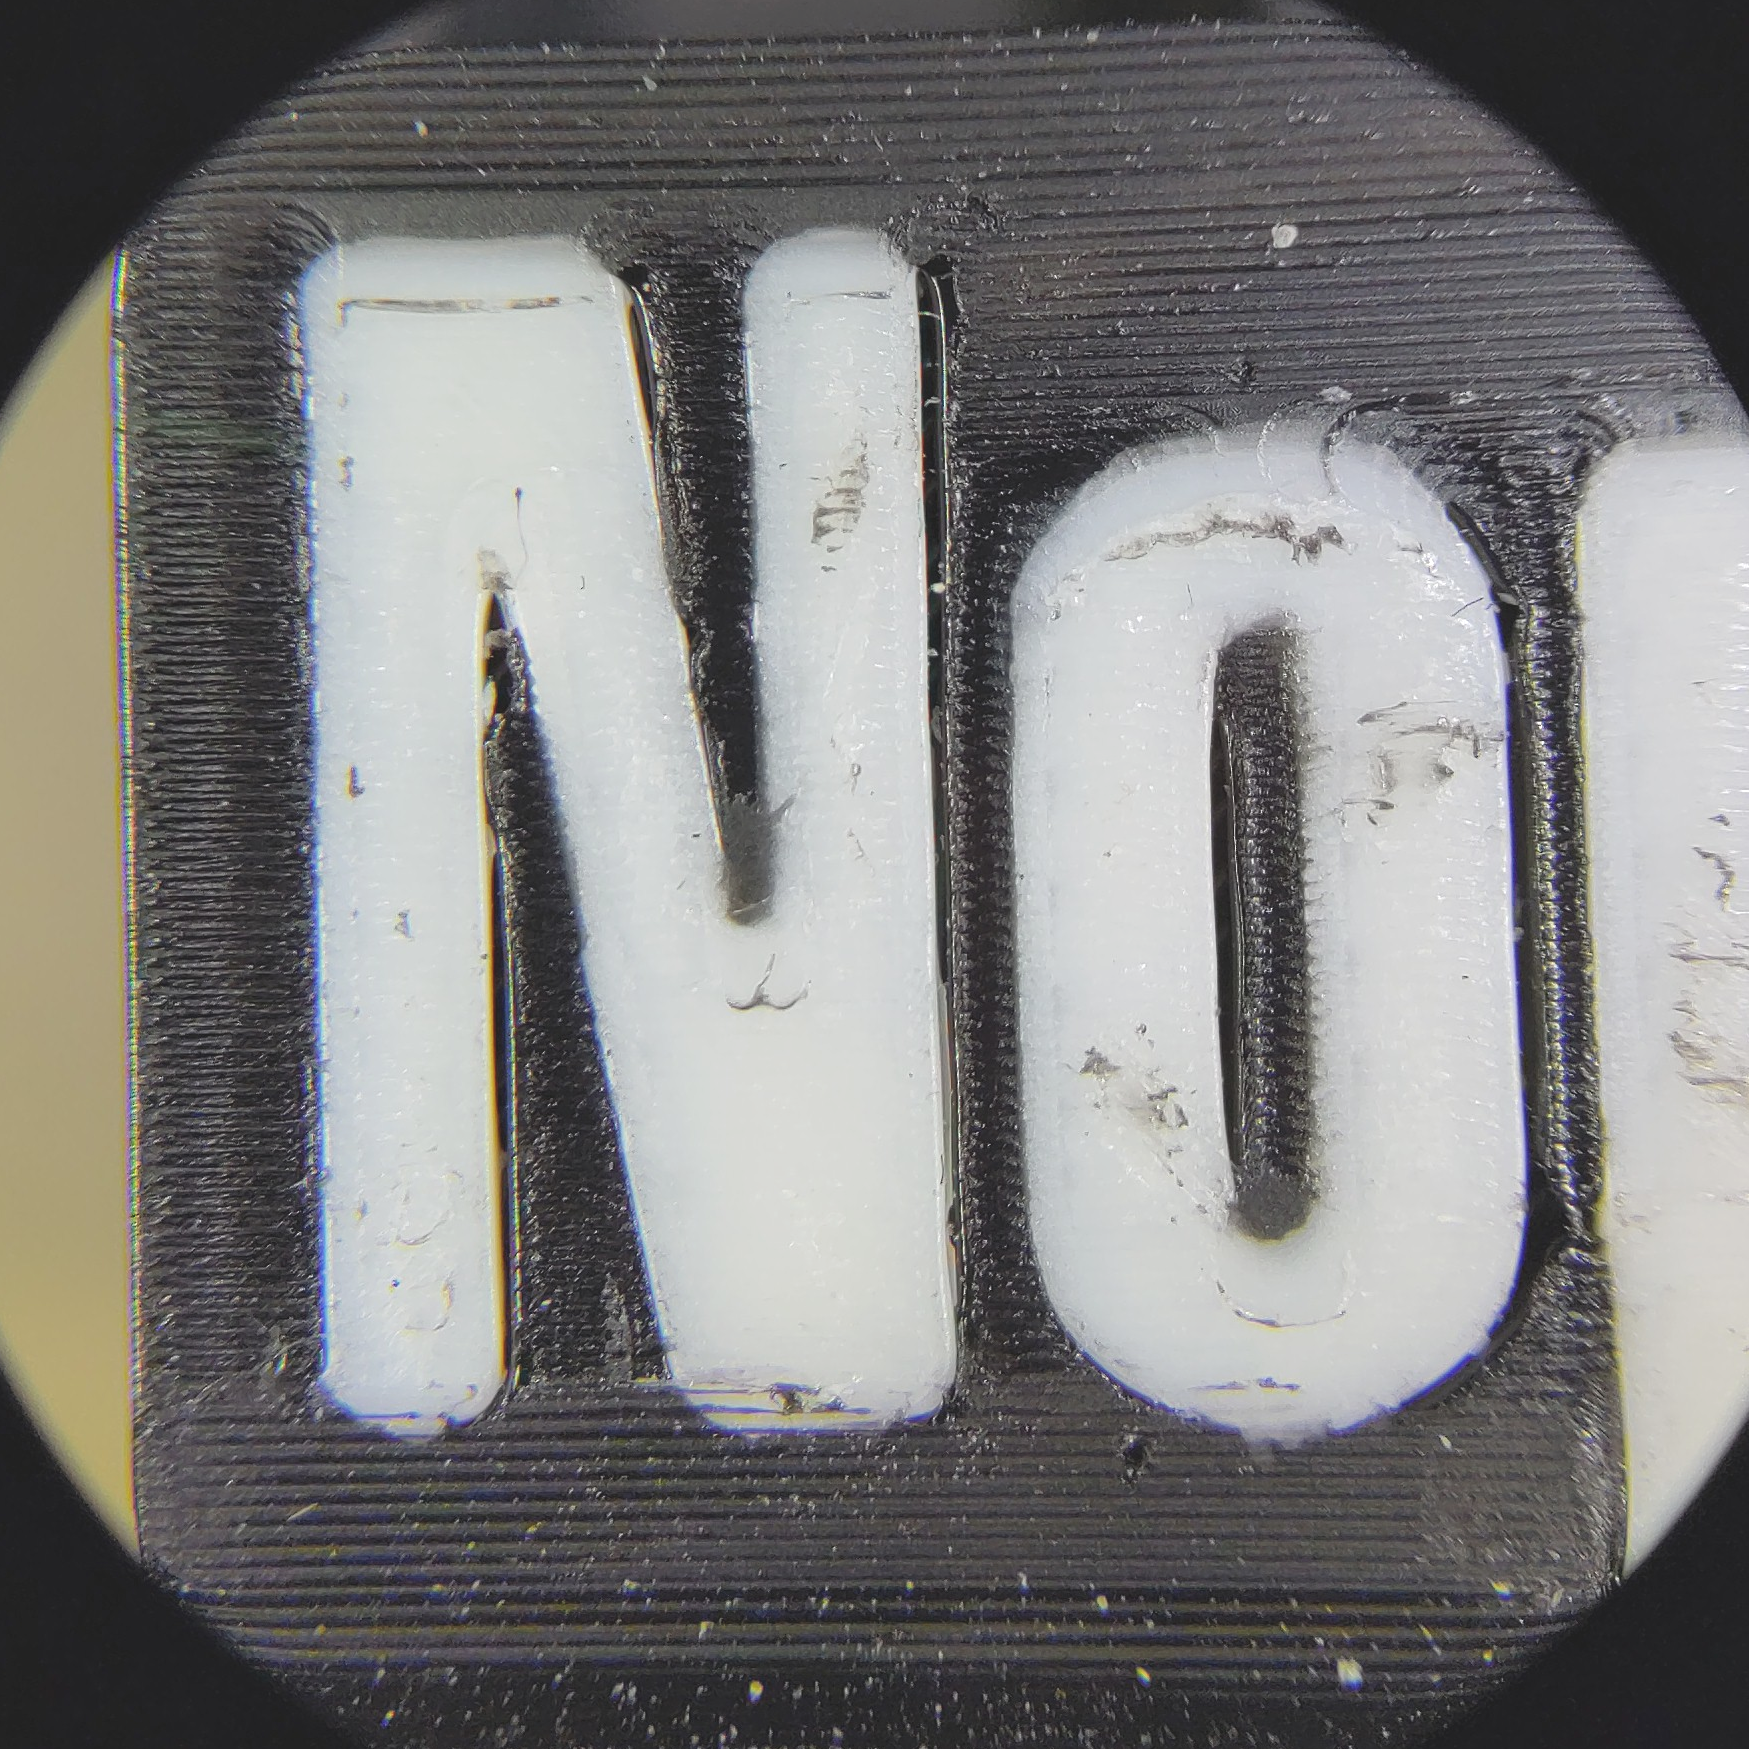
However, I also turned on ironing and that seems to have created black smears in the white letters: it looks like black material that got picked up by the white nozzle at the edge of the letters and got dragged across.
I know it’s ironing because it’s just at the surface and it scratches off easily with the tip of an x-acto knife.
So, I think ironing may not be such a great idea with such small bi-color features. Maybe the smearing is acceptable on the edge of a large features with another color, but those letters are 10mm so it kind of ruins them across the entire width.
Apart from that, there are gaps between the black and the white material on the right-hand edges of the letters. But it only shows under the microscope: they’re not really visible, and certainly don’t stand out like the black holes right in the middle of the letters like before.
So for the next print, I’ll turn off ironing and see how it goes. I think one-wall alone will do nicely.
Thanks for the tips everybody!
I know nothing about 3D printing, but I’m irrationally, deeply invested since I saw your first post with the holes. Progress!
Something tells me you’d have fun if you got yourself a printer and got into the hobby. Hint hint… 🙂
Damn, I might need to!